I am well into my second painting of spools, and thought I’d give a sneak peek of my progress. Several people have asked me how I do some of the detail work, so here is a step-by-step on how I paint spool threads. This is a simple, basic spool without a sticker on the top.
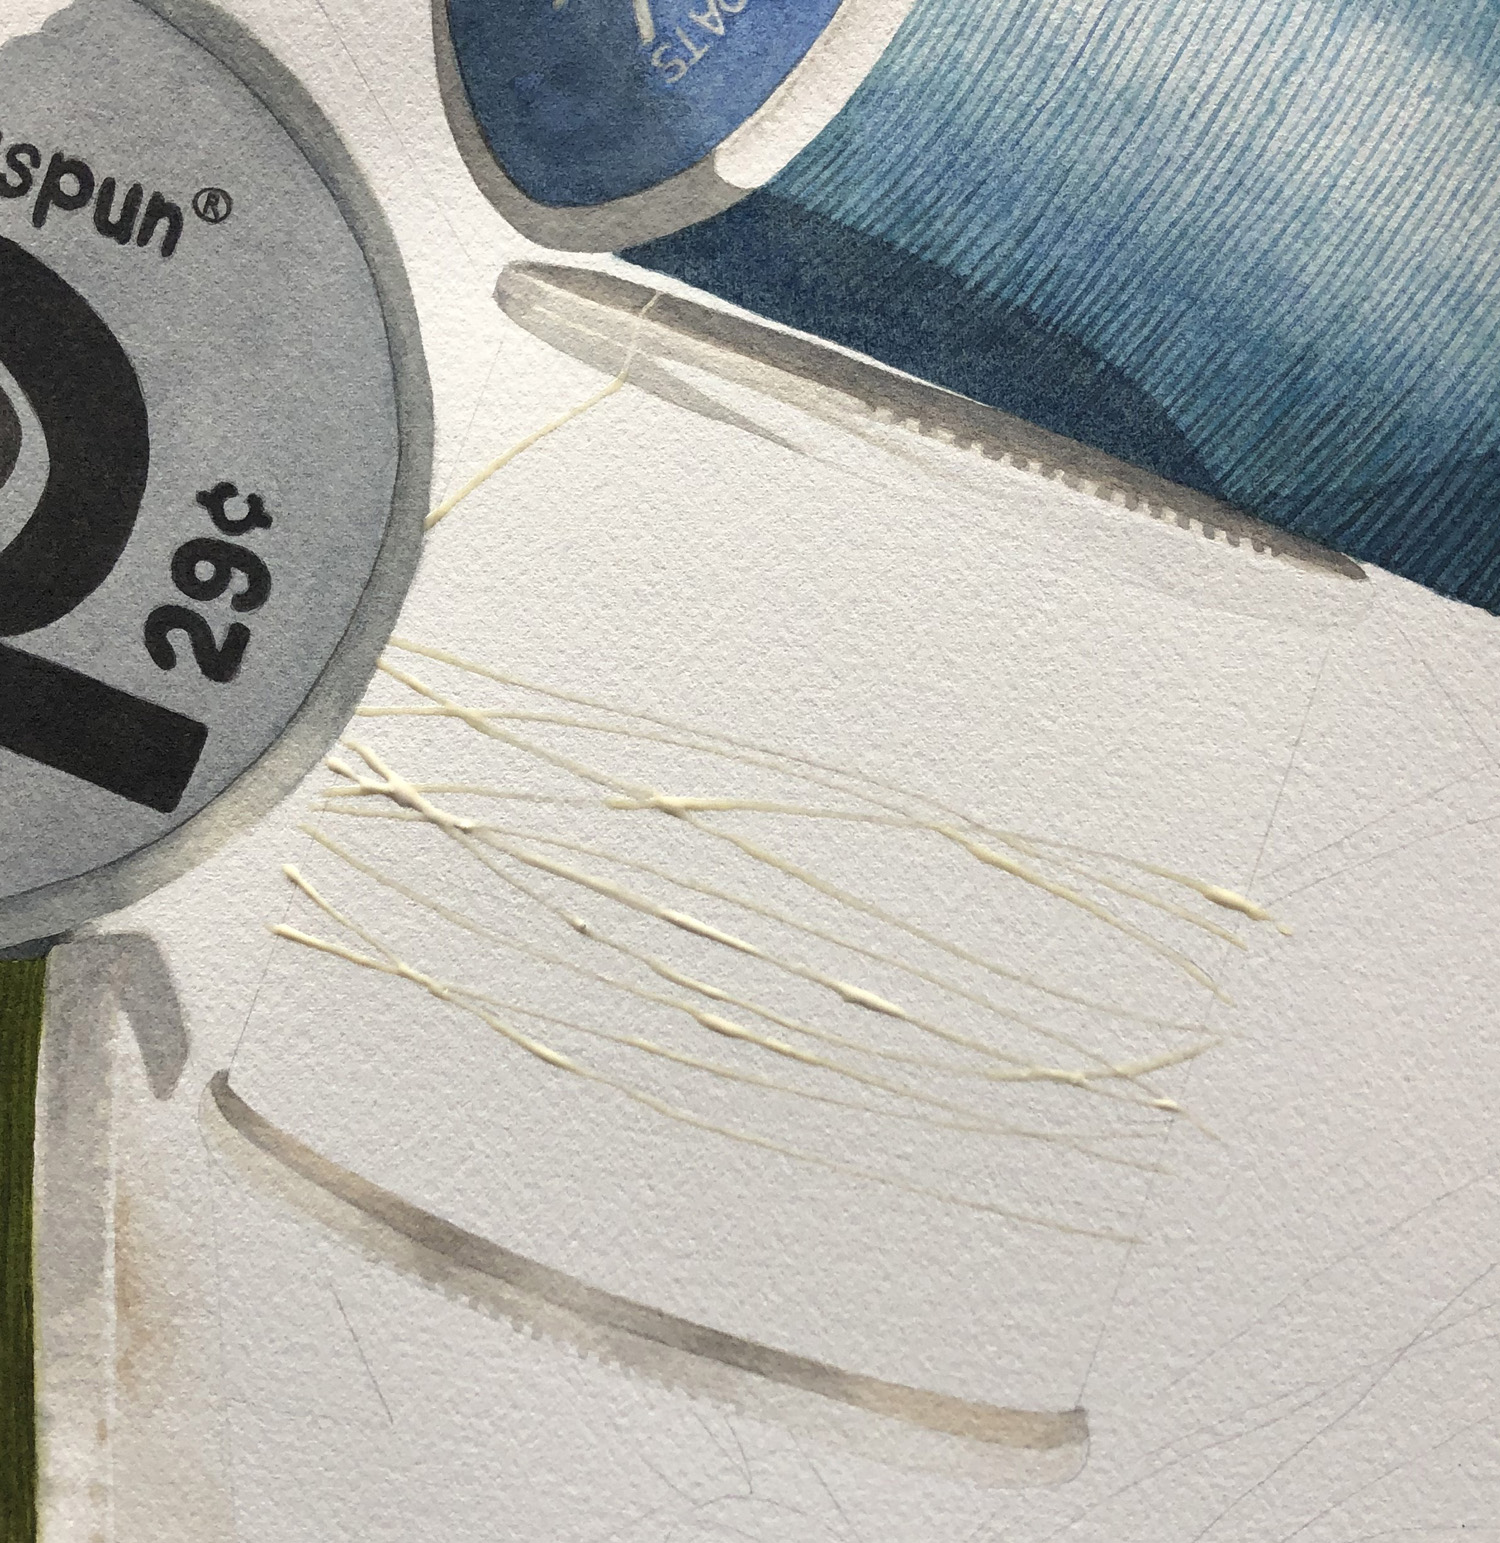
First, I use a kneaded eraser to lighten all of my drawn lines of the spool. I always start with the spool ends. In this case, several thin layers of grays and browns. The spool ends are actually white, but the shadows are different colors. I then use resist to preserve the whites of the loose pieces of thread. I try to paint them as thin and even as possible. I create a wash of the base color, preserving the whites where the light hits the spool.

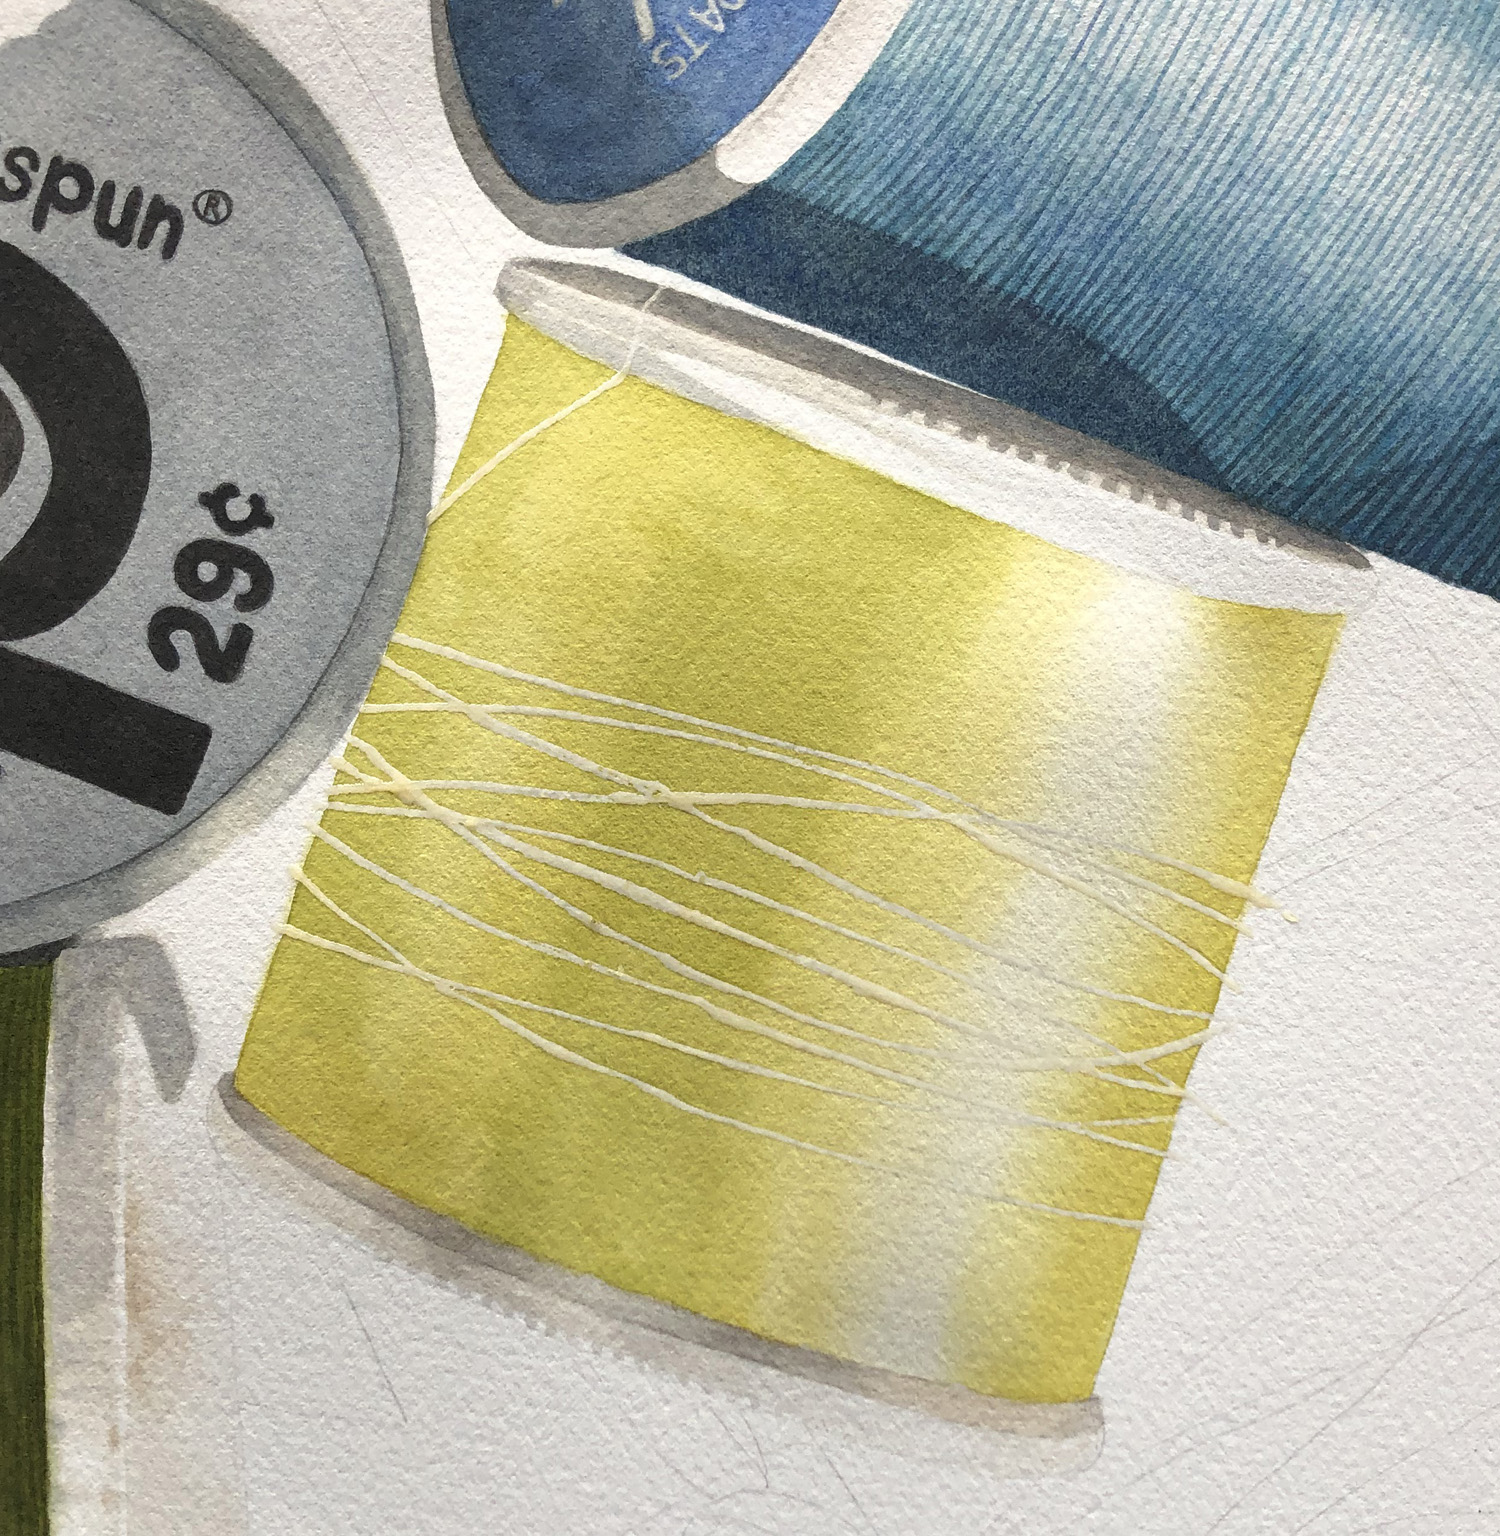
Then I do two more washes, incorporating tints of orange and green.
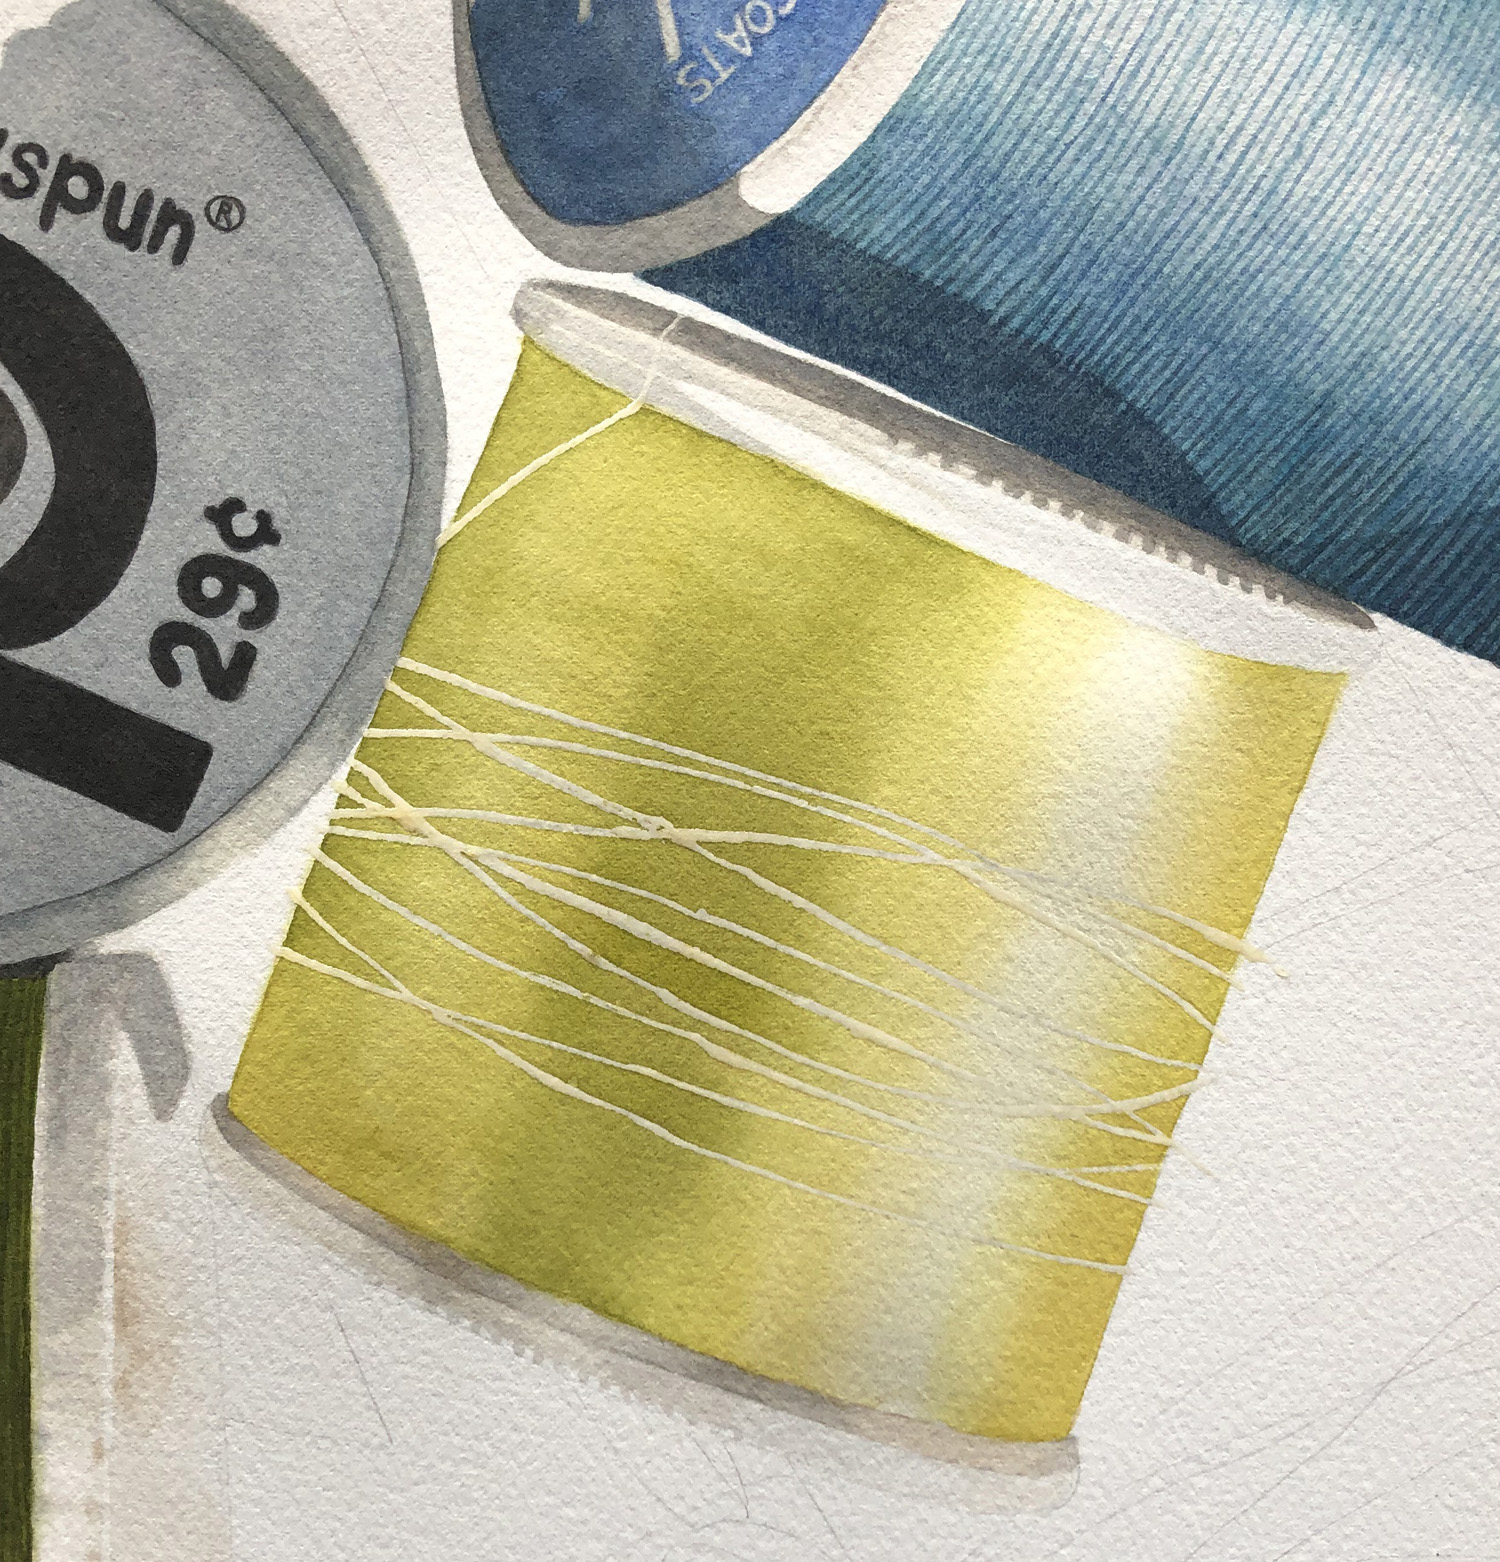
Next is the most difficult step. I don’t paint the threads of the spool, but rather the shadows of the threads of the spool. I try to keep them as even as possible using a #00 brush. I also use a scrap of paper to roughly measure as I go along on the spool, because it’s very easy to mess up your lines once you get to the loose threads. Next, I subtly darken the thread shadows with a variety of mixed colors.


I paint light washes over the spool to give it more body. I paint in the direction of the threads, a few threads at a time, so I don’t wash away all my hard work painting the lines. Before removing the resist, I lightly outline the bottom of the loose threads with the darker green. This is so I can easily find the threads. Once the resist is removed, I clean up the edges of the loose threads.

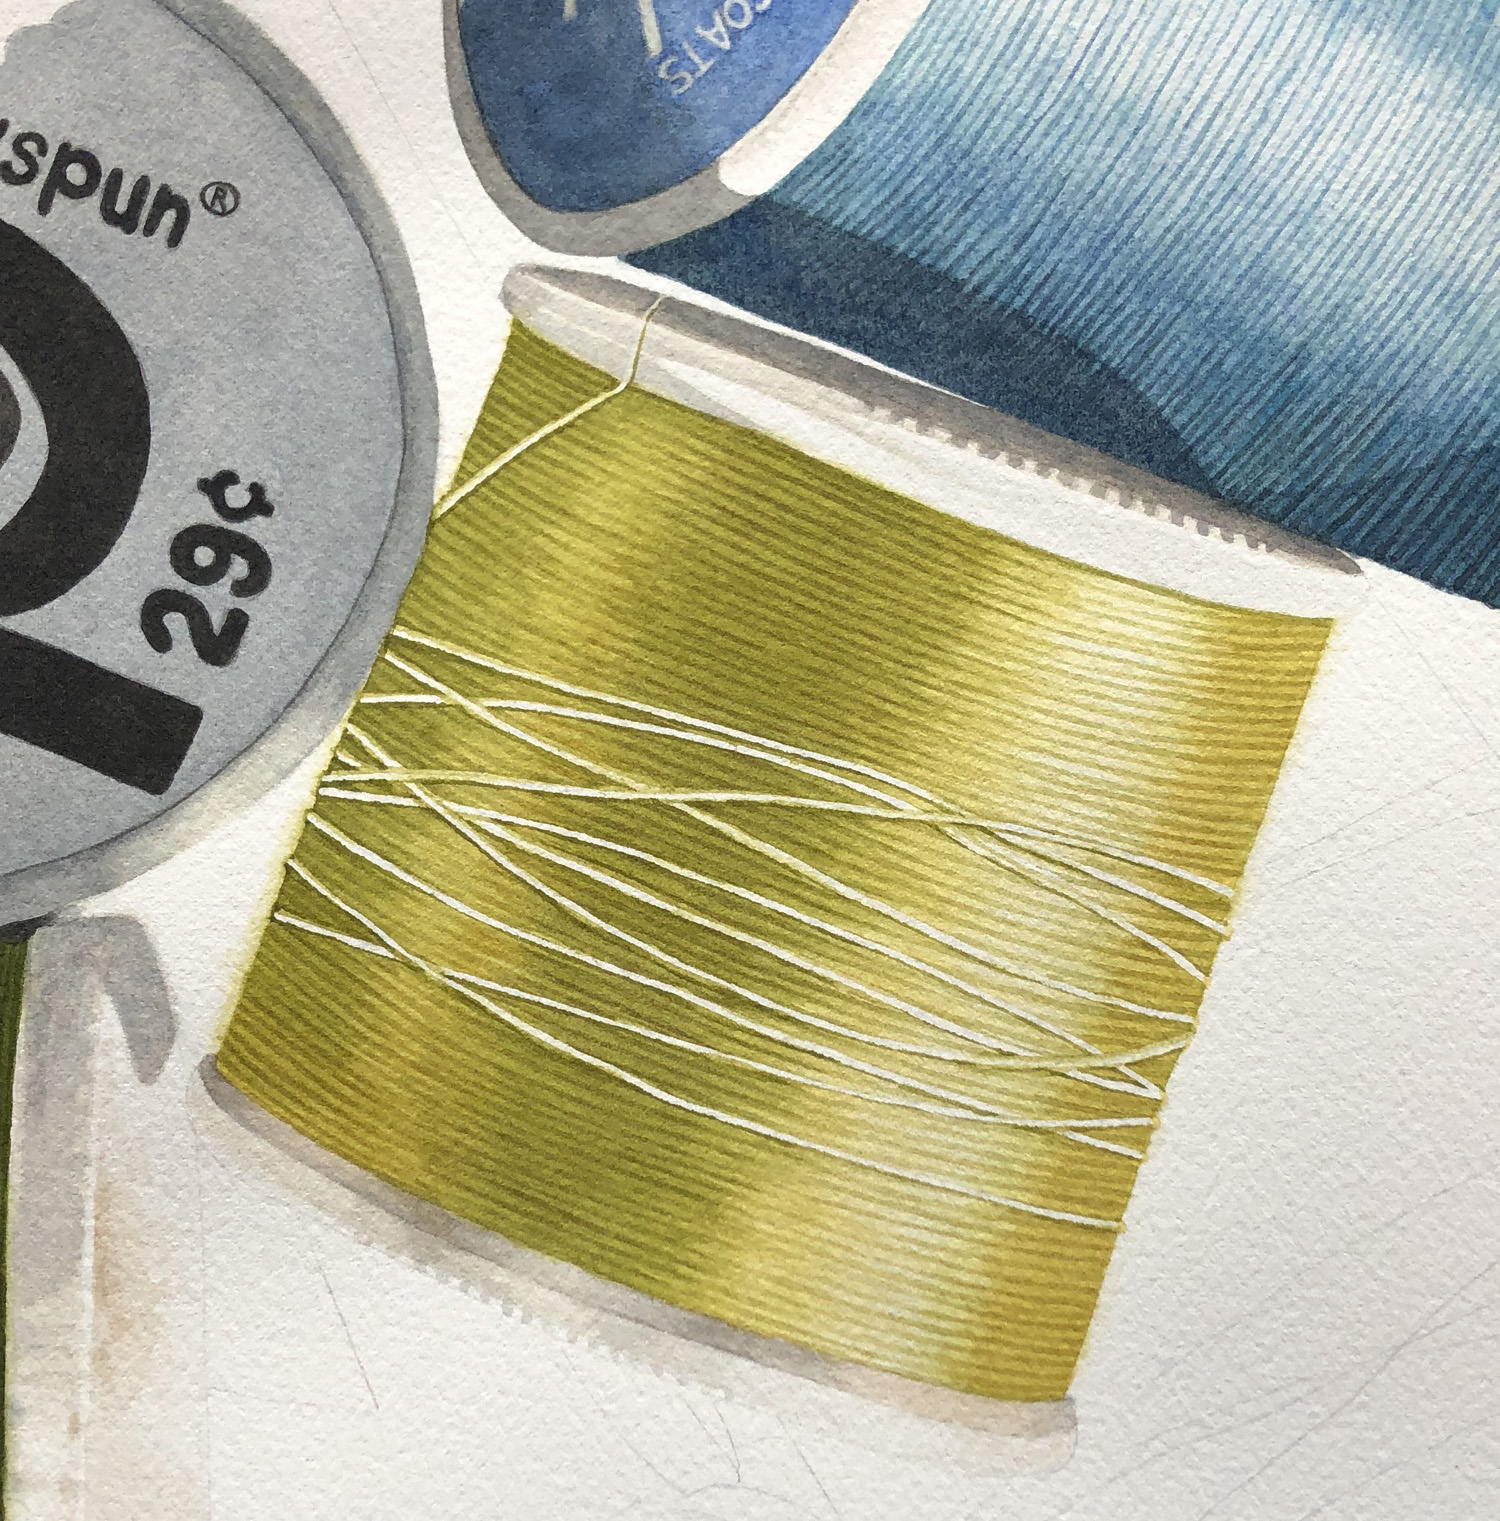
Finally, I add color back onto the loose threads, paying attention to make sure some areas blend in and the highlighted areas stand out. I also darken some of the shadow areas.

A simple spool such as this one usually takes approximately 3 hours to complete. Once I paint in more of the surrounding spools and the dark background, I might go back to the spool to tweak the colors and darken any shadows. But for now, this spool is done.
