To continue with my painting’s progress…
I built up the foliage and started on the pine needles, which was the part I was most excited about painting.
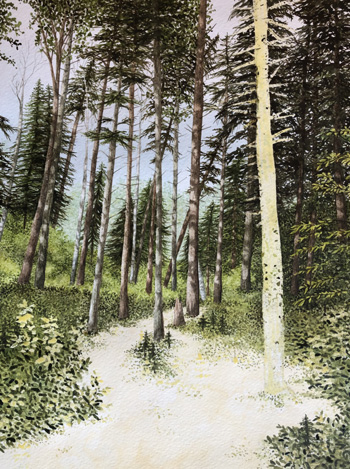
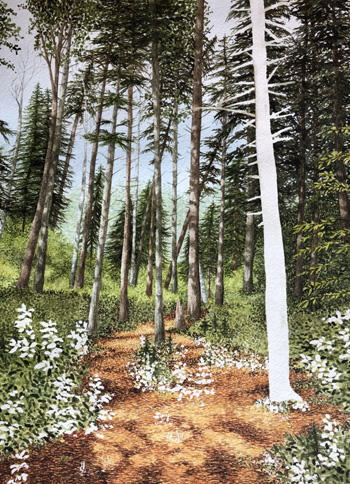
The pine needles required 6-8 layers of different colored paint and markings. The following examples show how the marks in the background are tiny dots and as it comes forward, the brush marks change to dashes. This makes it look more like pine needles. I began with light tones making the colors darker with each new layer.
Example 1 (3-4 layers)

Example 2 (3-4 additional layers)

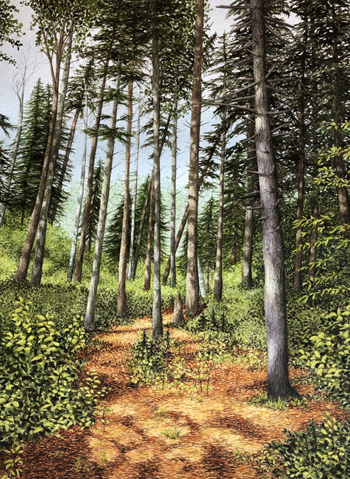
Another 2-3 layers and the path was complete. It took me several hours just to paint the pine needles.

I removed the last of the resist off the foliage and the final tree. The resist on the tree had been there for many days at this point and needed to be removed very carefully. Normally I try to remove it within 2-3 days, but I wasn’t able to do that with this painting.
Next, I painted in the foliage highlights and blended the foliage into the path.

Lastly, the remaining tree is painted. I went over the entire painting, adding cool shadows and warm brightening highlights. Here is my finished painting, entitled Enchanted Wood.

Beautiful painting. I am amazed by the details. Keep up the good work!!